Local-Layer-Splitting.github.io
Local Layer Splitting G-code Generator
Description
Local Layer Splitting (LLS) is a silicone 3D printing method that uses a variation in layer height to generate pneumatic actuators. The variation in layer height, using the same printing nozzle, results in a variation in the mechanical properties of the printed material (tensile strength). The LLS method utilizes this variation in mechanical properties to create pneumatic actuators whose deformation is defined by the printing process rather than the shape.
This page is a user guide for the Grasshopper G-code generator, which allows the printing of pneumatic actuators with multiple layer heights. The generator is currently functional with tube shapes, but it is not guaranteed to work with other shapes without adjustments.
For more information on LLS, please refer to the corresponding paper : DOI = ….
User Guide
The Grasshopper file can be found here : LLS files
Grasshopper is an extension of the Rhino 3D modeling software. This extension allows for parametric generation, and here we use it to generate G-code containing multiple layer heights on the same layers. This guide describes the different steps necessary to use the G-code generator.
Setup
The first step is to install Rhino. The version we used is Rhino 7. To use our Grasshopper code, it is necessary to download the librarie Xylinus.
Modelisation
The first step is to model the external surfaces of the pneumatic actuator in Rhino. This generator is a prototype designed to create tube-shaped pneumatic actuators. In this guide, we will limit ourselves to this shape, it may be necessary to make modifications to the Grasshopper code to create other actuator shapes. The current generator allows for the integration of a maximum of two distinct layer heights.
Our tube is composed of 3 distinct parts:
- The bottom layer: This consists of an external surface and an optional internal surface for air intake. It is possible to omit the internal surface to obtain a continuous bottom layer.
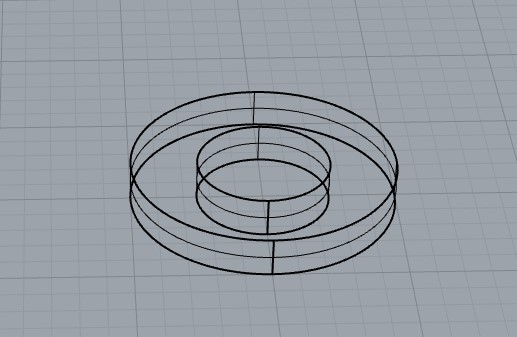
- The main wall: This is the wall with the largest layer height. For two-component silicone, we recommend using 2/3 of the internal nozzle diameter as the maximum layer height. A higher layer height may cause printing issues.
- The compressed wall: This is the wall with the smallest layer height. For two-component silicone, we recommend using 1/3 of the internal nozzle diameter as the maximum layer height. A lower layer height may cause printing issues.
Note: We have separated the two walls as main and compressed for easier understanding. The actual order is not important as long as the parameters are well defined.
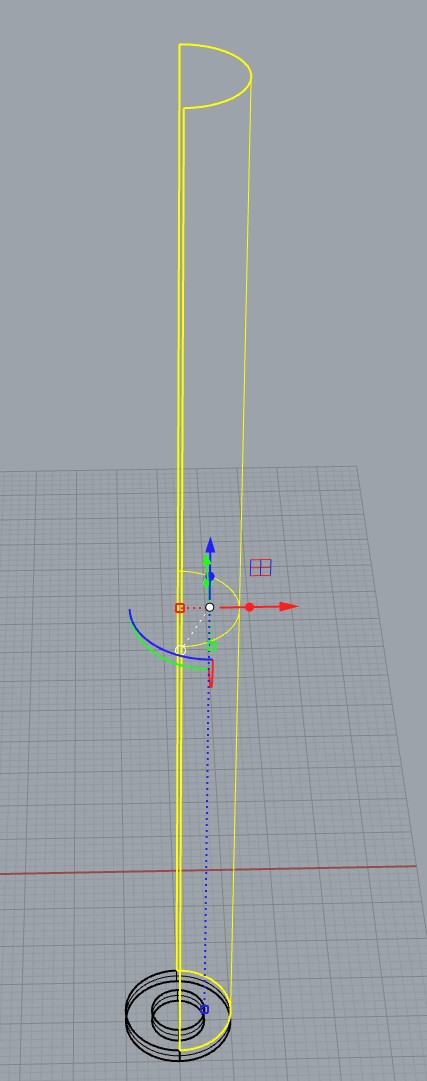
Grasshopper
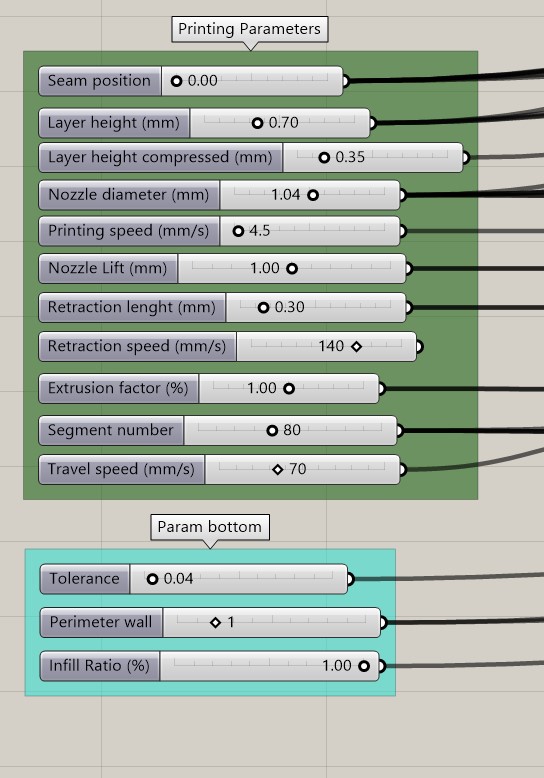
- At the bottom left, you will find various printing parameters. It is recommended to start by defining them. The number of shells used in the paper is 1, using more outer shells might require modifications in the Grasshopper code.
- On the far right, there are two large yellow text blocks, which are the areas for the start and end scripts of the G-code. Depending on the printer used, the start or end G-code may be different.
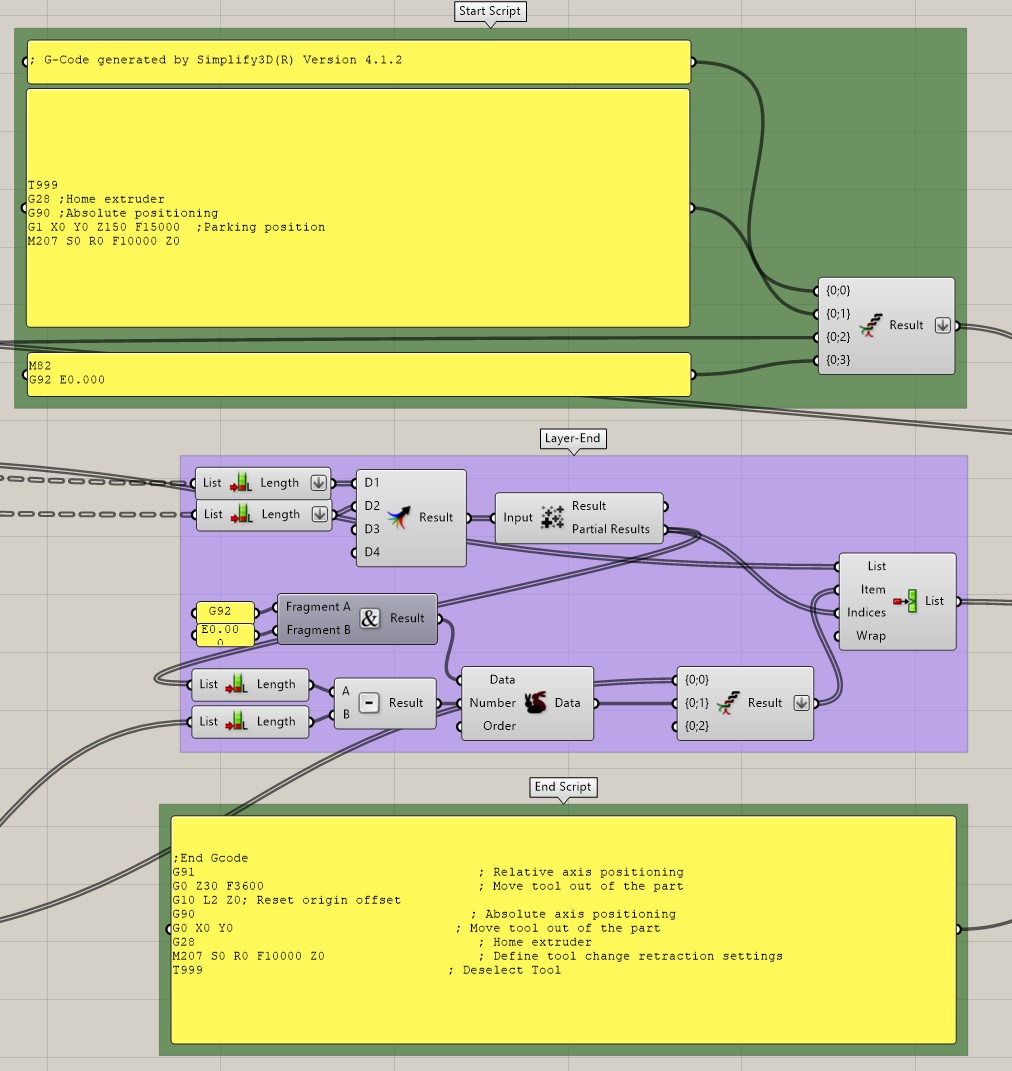
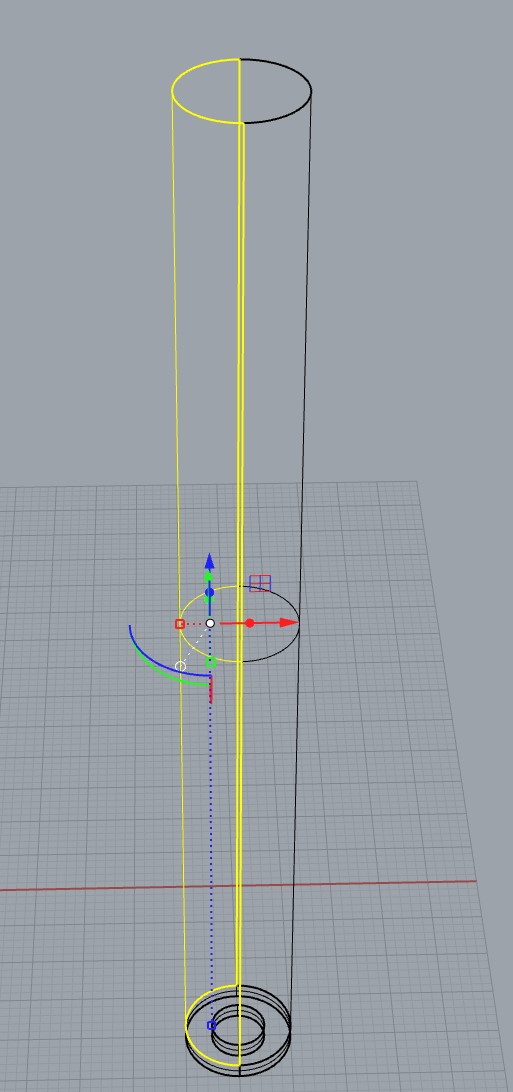
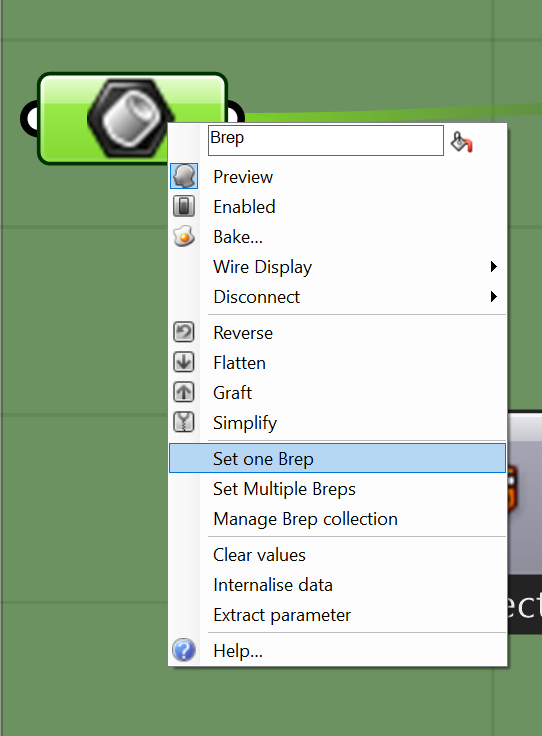
- Now that the parameters are defined, they need to be linked to the surfaces of the model. To do this, select the BREP functions and define the surfaces associated with each function. These functions mark the beginning of the 4-layer generation blocks (see next image). Right-click on them, then select “Set One Brep,” and choose the corresponding surface on your Rhino model.
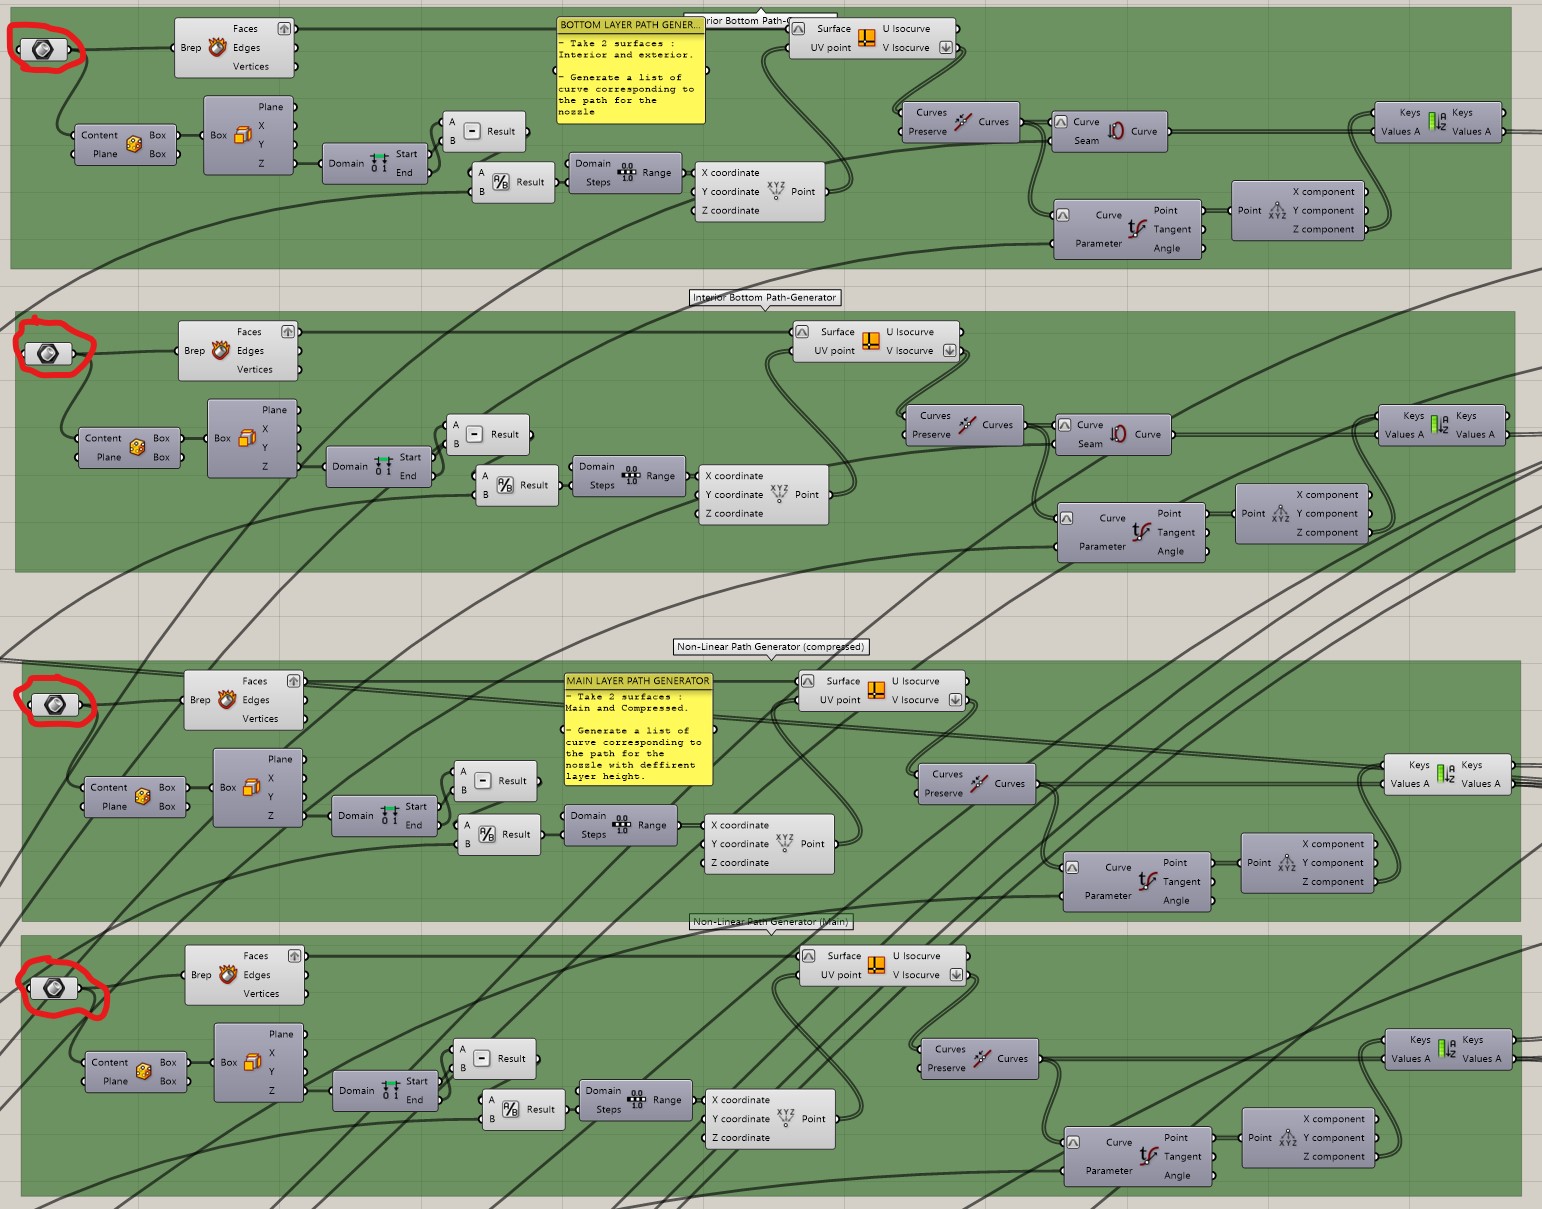
When the BREPs are defined, the Grasshopper code automatically generates the G-code. It can be seen in the yellow box on the far right.
G-code Generation and Saving The G-code can be directly extracted from the visualization yellow box on the right or saved locally. To save it locally, select the save path in the “File Export & Preview” box on the left, then define the file name, and click on the save button. The Preview function does not work.

Printing
Once the G-code is generated, it can be directly printed by a 3D printer. (We recommend conducting tests beforehand to ensure that there are no unexpected actions.) Our tests were conducted using a silicone 3D printer from Lynxter, model S600D. Depending on the height and size of the actuator, as well as the silicone used, it may be necessary to slow down the printing speed or adjust the chamber/bed temperature.
Credits & Contact
This work was made in partenership with Lynxter and the french Institute for Future Technologies
For more information: brice.parilusyan@gmail.com